How to deploy and host a Jekyll website in Azure blob storage using a VSTS continuous deployment pipeline
Part 1: The VSTS Build

Now the fun begins, we have a website to deploy, a VSTS project and a Git repository. It is time to start that continuous deployment pipeline we want to build!
Table of content
If you are beginning to read the article series, I recommend that you start by the introduction and prerequisites, to make sure you read the plan first then get all the prerequisites set up right.
| Articles in this series |
|---|
|
Introduction and prerequisites
In this article, we draw the plan and start the project. We will create a Jekyll website and create a VSTS project with a Git repository.
|
|
Part 1: The VSTS Build
You are here
In this article, we create the Jekyll build definition in VSTS.
|
|
Part 2: Create Azure Blob Storage, and configure static website
In this article, we create an Azure Blob Storage and we configure it to be ready for the deployment phase.
|
|
Part 3: The VSTS Release
In this article, we create the release definition. At the end, every code push in `master` will be deployed automatically.
|
|
Part 4: Configuring a Content Delivery Network (CDN)
Coming soon
In this article, we create the final piece of the puzzle, the way to access our Jekyll website using a custom domain over HTTPS. We also update the VSTS CD pipeline to account for this new addition.
|
|
Infrastructure as code
In this article, I give you the YAML code that you can use to automatically create the build definition by adding a `.vsts-ci.yml` file to your Jekyll website. This can replace "Part 1: The VSTS Build".
|
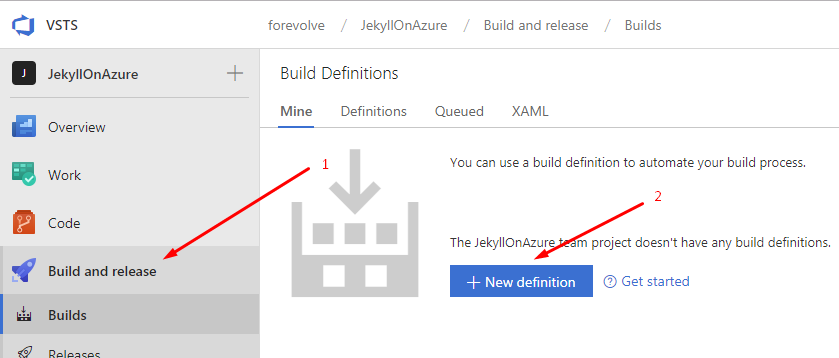
The first thing that we need is to create a Build definition.
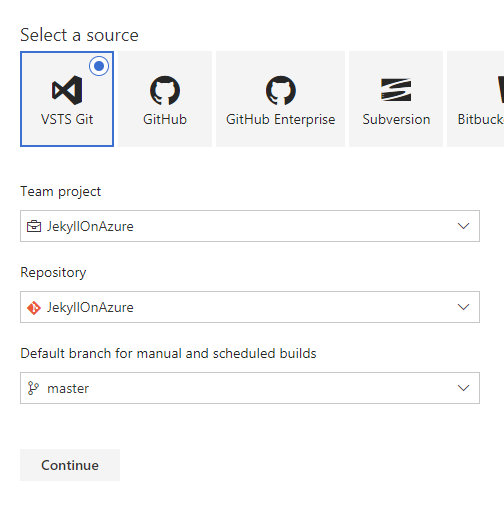
Then select a source: choose your VSTS Git repository.
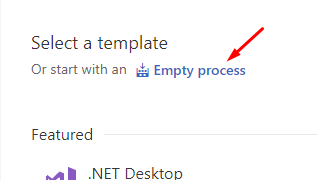
Then start with an Empty process.
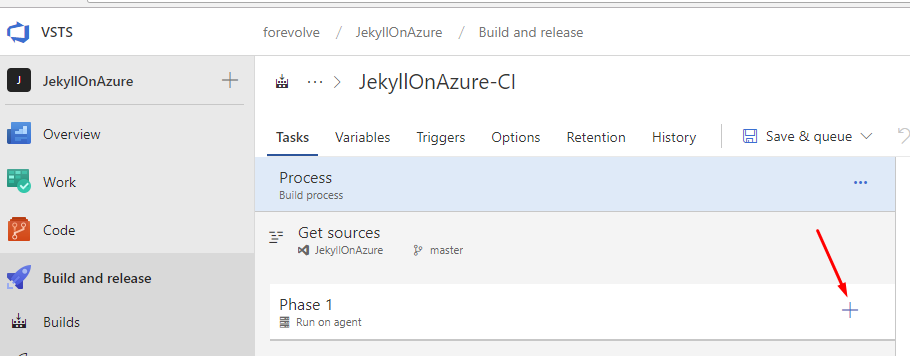
From there we need to add a few tasks. Each task are executed in order during the build (or release) process.
To add a task click the + button, next to the phase.
Add build tasks
Since we know what we want to do, we can add all build tasks then we can configure them later one by one. This will save us some time. Productivity is always important!
Add Task 1: Ruby
Since we need Ruby, let’s start by adding that.
An excellent way to find what you are looking for is to use the search box.

Add Task 2, 3 and 4: Command Line
We need to execute 3 commands:
- Install Jekyll and bundler
- Install Gems
- Build the Jekyll website
As you may have noticed, we are replaying the steps that we did to install Jekyll and to build the website locally. But instead of serve, we will build it.
We could use only one “Command Line” task here, but I prefer to split the commands in three tasks instead; I find it clearer this way (you will see).
Back to business: click 3 times on the “Add” button to add 3 Command Line task.

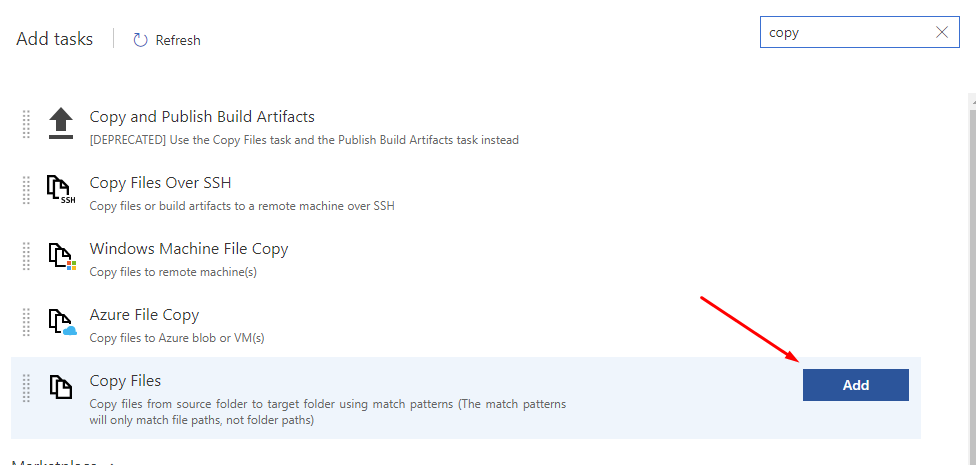
Add Task 5: Copy Files
Next, we want to copy the Jekyll output to the staging directory.
To do so, use the Copy Files task.
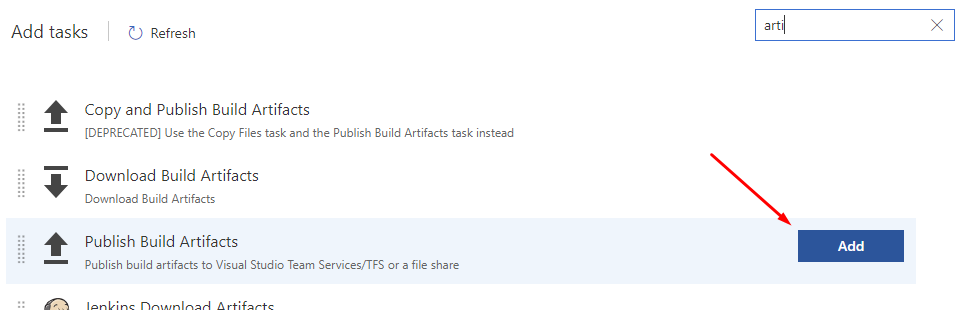
Add Task 6: Publish Build Artifacts
Finally, we want to publish the artifact that we copied with the previous task; to do so, add a Publish Build Artifacts task.
Configure build tasks
Now that the pipeline is initialized, we can configure it task by task; but, before going further, make sure that your build pipeline looks like this:

Configure Task 1: Ruby
You can leave the Ruby task as is, no need to change anything.
Configure Task 2: Install Jekyll and bundler
I believe it is essential to give a relevant name to your tasks, so you and others know what they do by reading their name.
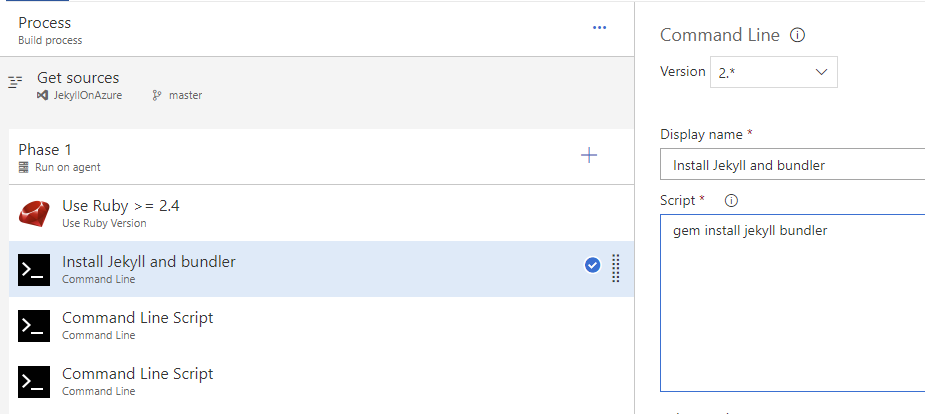
- Display name:
Install Jekyll and bundler - Script:
gem install jekyll bundler
Configure Task 3: Install Gems
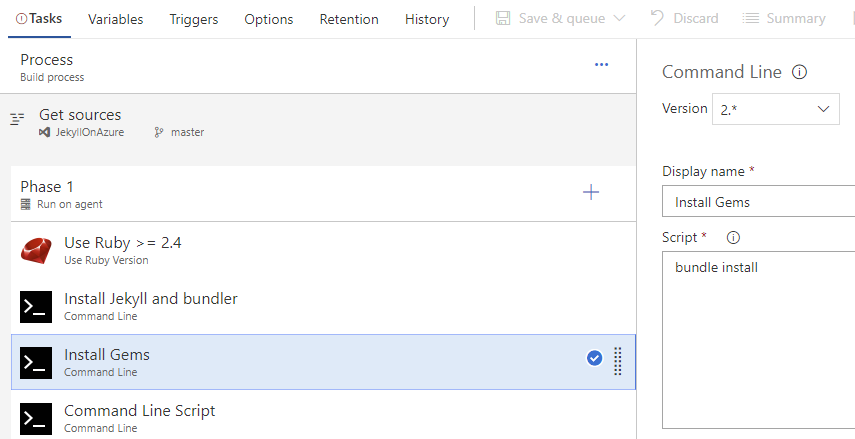
- Display name:
Install Gems - Script:
bundle install
Configure Task 4: Build the Jekyll website
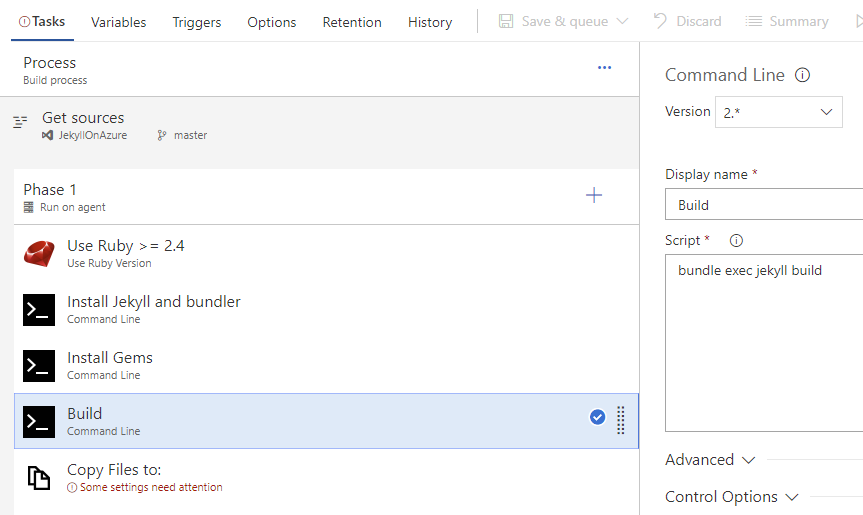
- Display name:
Build - Script:
bundle exec jekyll build
Configure Task 5: Copy Files
For this one, we want the _site directory (where Jekyll generate the static website) to be copied to the $(build.artifactstagingdirectory).
We will use that directory in the next task to publish the files. Those files will then be accessible from the “build artifacts”.
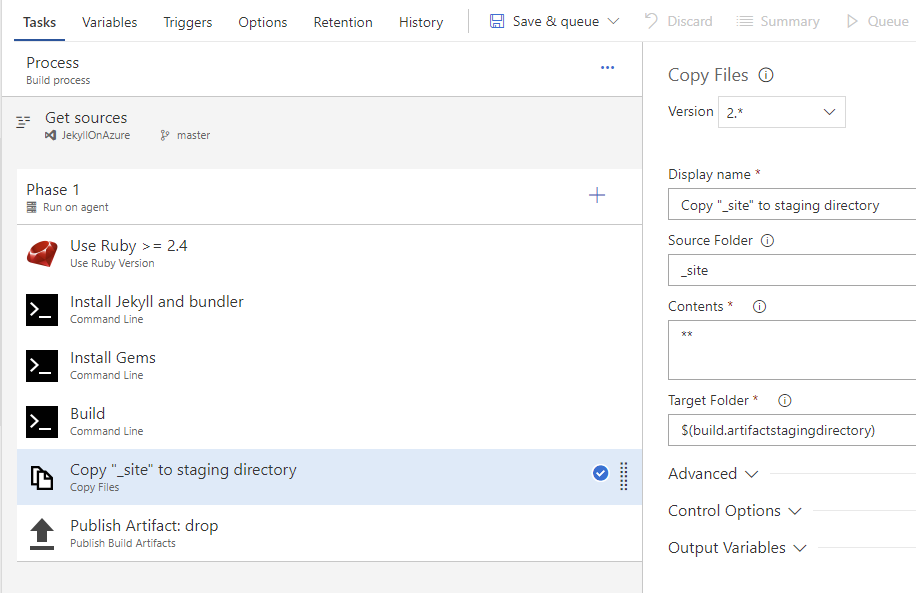
- Display name:
Copy "_site" to staging directory - Source Folder:
_site - Target Folder:
$(build.artifactstagingdirectory)
Configure Task 6: Publish Build Artifacts
Finally, we want to publish the website as an artifact (that we will use later; during the release). To be more concise, let’s name the artifact _site instead of drop.
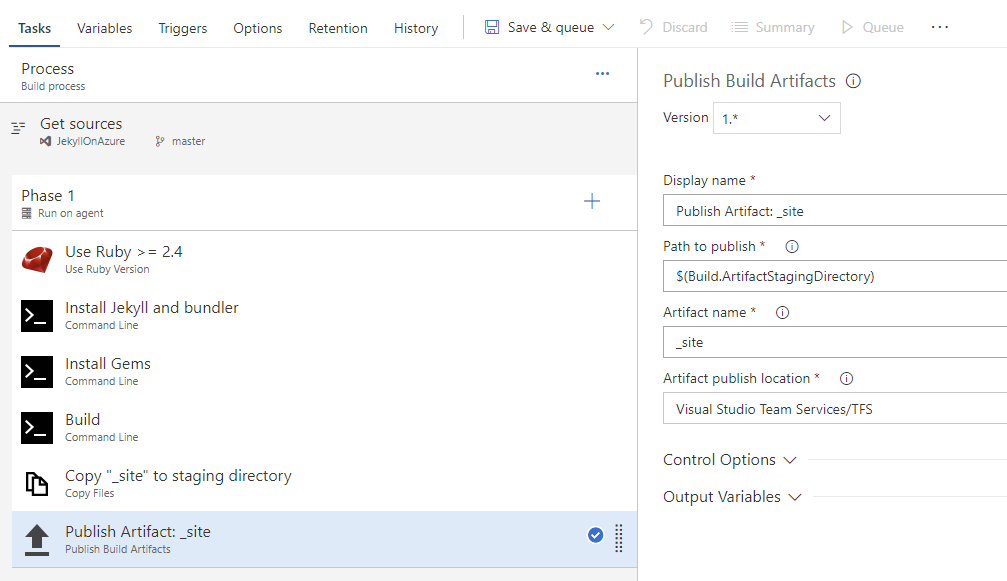
- Artifact name:
_site
By looking at the build definition (from the above screenshot), it is easy to know what each task do, only by reading their name. This was my exact point when I talked about naming your tasks right.
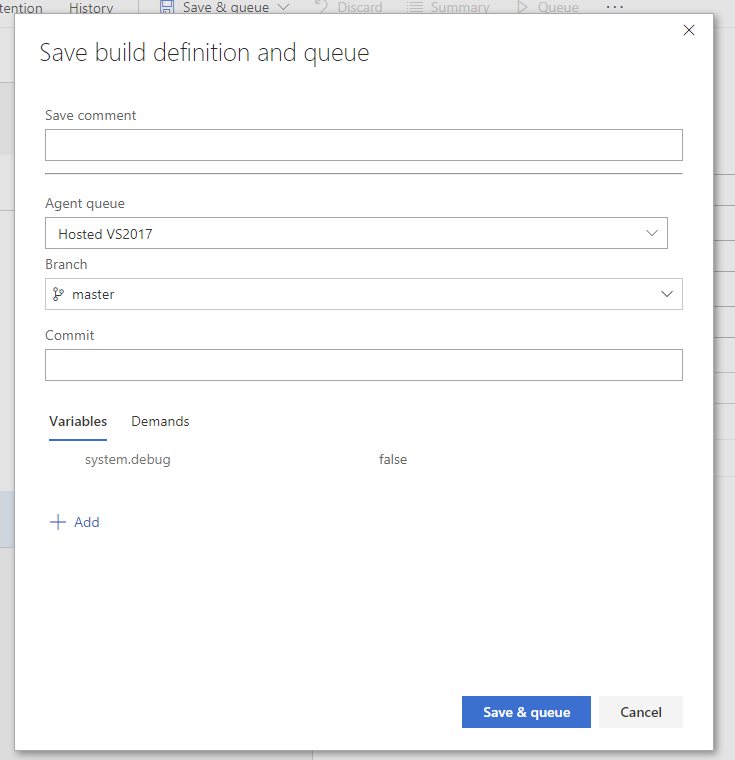
Save and run the build
At this point, our build definition is completed. So let’s save and run it to make sure it is indeed working as expected.
I believe that it is essential to quickly test every building block of what you are developing (could be a program, a CD pipeline or something else; it doesn’t matter). If you wait too long before testing, you will first need to find what part is generating the problem before diagnosing and fixing it! You better limit the area you want to test to a minimum.
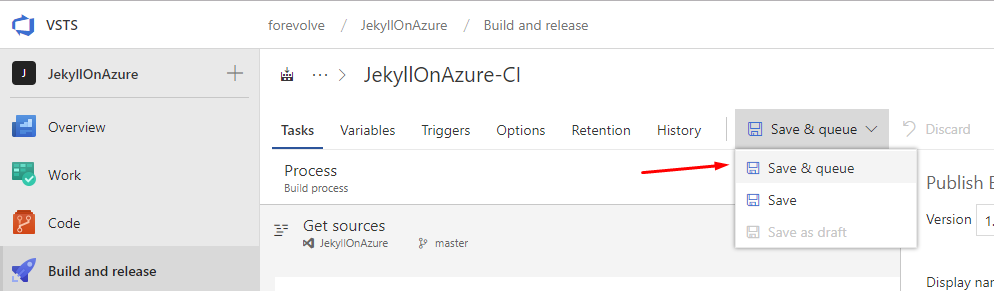
Then keep the default values and hit Save & queue.
Once the UI update, click on the build number, this will redirect you to the build details view.
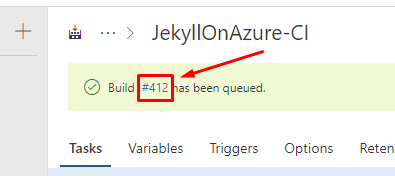
Form there, you should see the build start.
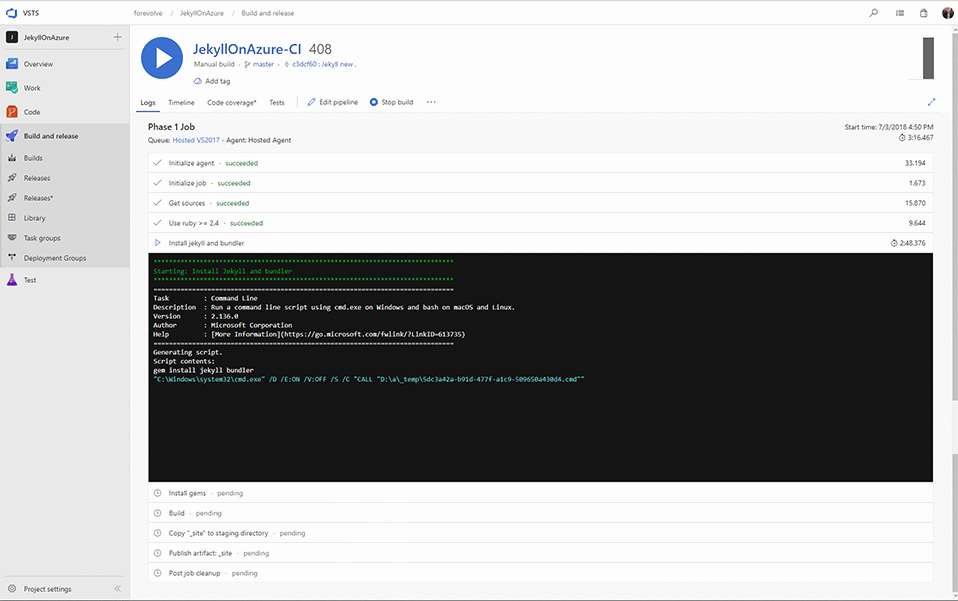
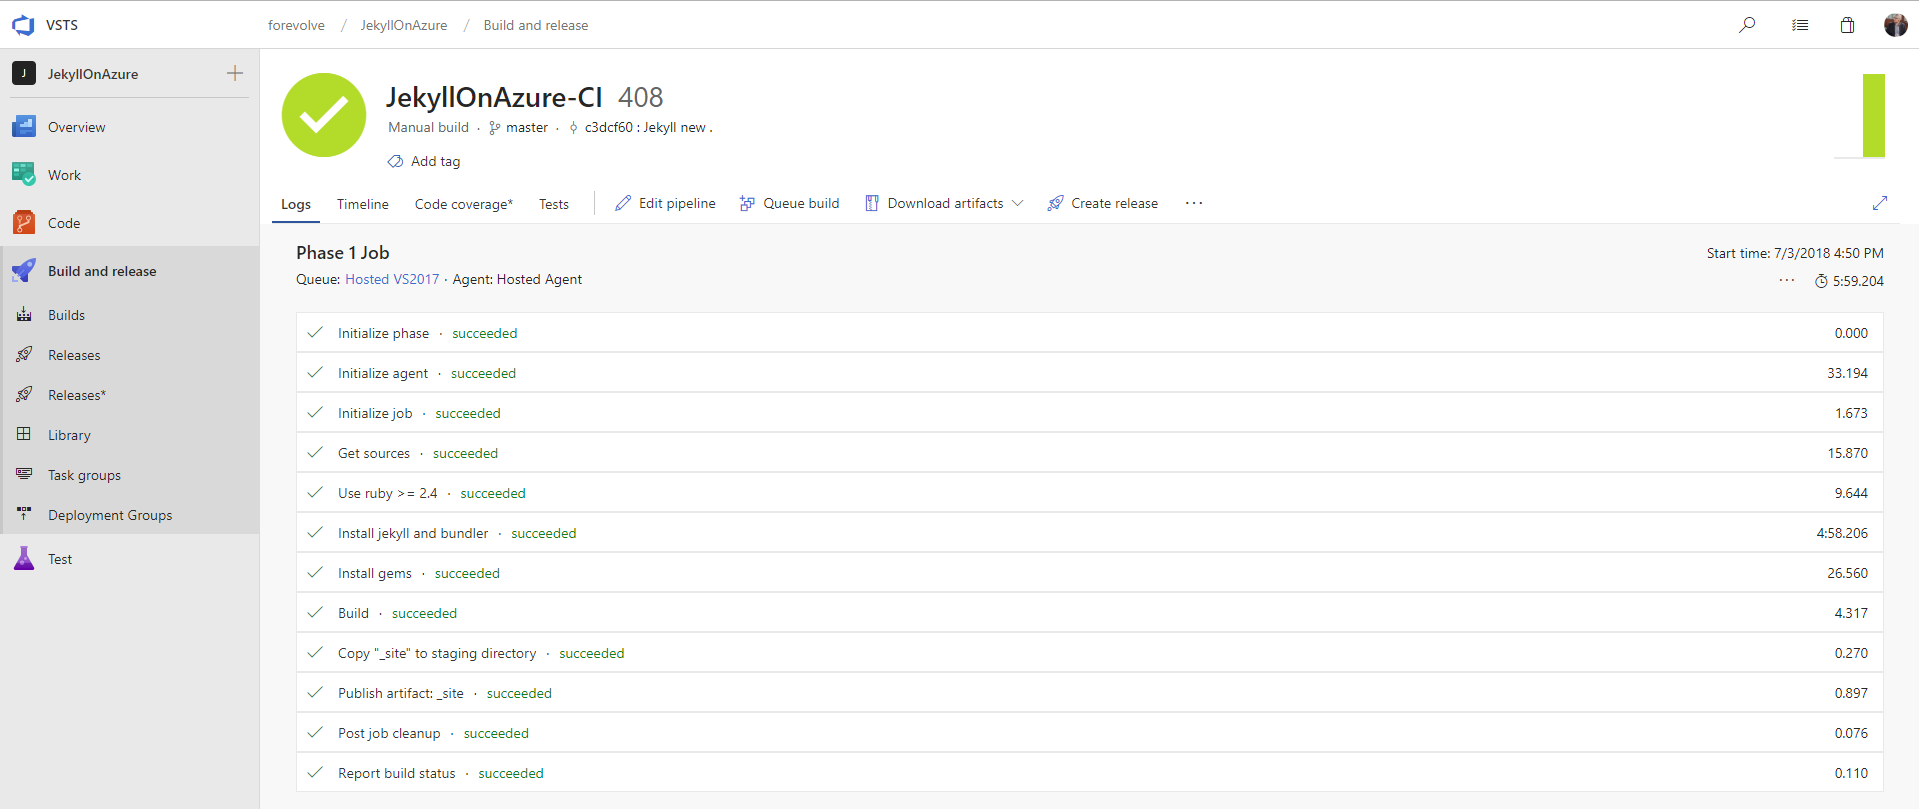
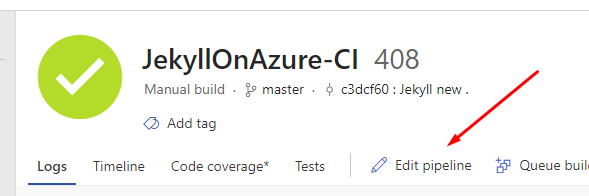
And the build succeeded!
As you can probably imagine from this last screenshot, splitting one bigger script into multiple smaller tasks (and giving them proper names) can help you diagnostic build problems and help follow the build progression.
From this page, you should be able to download the build artifacts, if you want to make sure the artifacts published are what we expect them to be.

Configure Continuous Integration
Now that we know that our build works, the last piece is to set the build to trigger automatically every time someone pushes code to master.
You can also set policies that force users to create branches and pull requests and all that good stuff, but for this article, let’s keep it simple.
To edit to the build definition click the Edit pipeline button.
Then navigate to the Triggers tab and check Enable continuous integration.
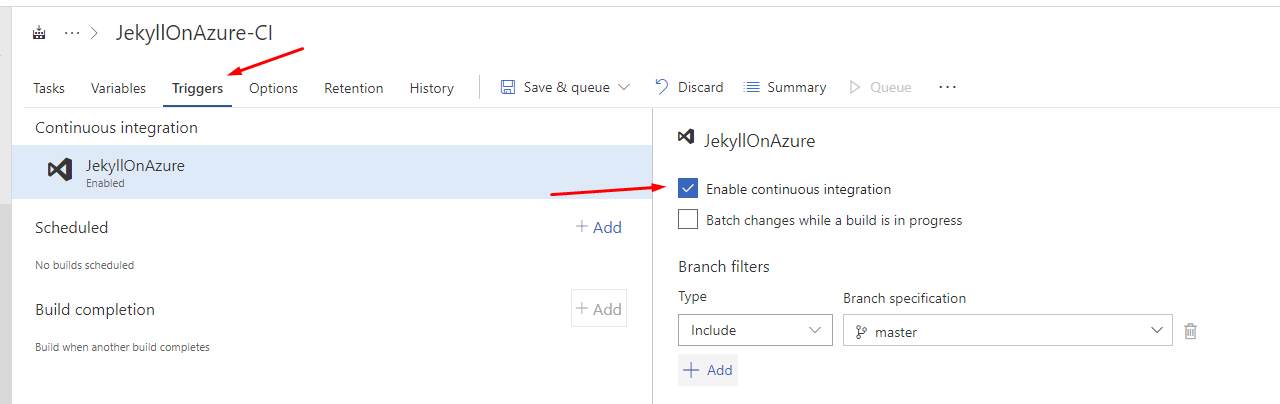
Save the build definition, and voilà, each push will now queue a new build!
You can push some changes if you want to try it out!
Infrastructure as code
If you want to automatically create the build definition when you push your code instead of manually following all the steps (and at the same time automating the build process creation), you can jump to Infrastructure as code and use the provided YAML code.
Alternatively, if you know what I am talking about, here is the code:
queue:
  name: Hosted VS2017
  condition: succeeded()
steps:
- task: UseRubyVersion@0
  displayName: Use Ruby >= 2.4

- script: 'gem install jekyll bundler'
  displayName: Install Jekyll and bundler

- script: 'bundle install'
  displayName: Install Gems

- script: 'bundle exec jekyll build'
  displayName: Build

- task: CopyFiles@2
  displayName: Copy "_site" to staging directory
  inputs:
    SourceFolder: '_site'
    TargetFolder: '$(build.artifactstagingdirectory)'

- task: PublishBuildArtifacts@1
  displayName: 'Publish Artifact: _site'
  inputs:
    ArtifactName: '_site'
Next step
It is now time to move to the next article: Part 2: Create Azure Blob Storage, and configure static website.