How to deploy and host a Jekyll website in Azure blob storage using a VSTS continuous deployment pipeline
Part 3: The VSTS Release

Now that we have a Blob Storage container set up for static website delivery, we need to deploy our Jekyll website there.
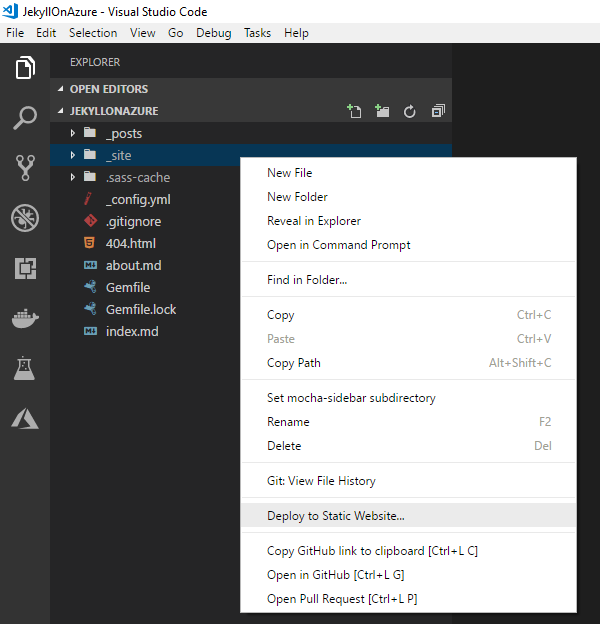
If you want to deploy your website manually, you can always use the Visual Studio Code Azure Storage extension that adds the Deploy to static website option to the file explorer’s context menu (follow the marketplace instructions to enable this preview feature).

Since we prefer the DevOps way of automating things, let’s instead head back to VSTS to create a Release definition to deploy our previously created Build.
Once again, I activated the VSTS Release UI preview so your UI may differ a little, What can I say? I like new stuff!
Table of content
If you are beginning to read the article series, I recommend that you start by the introduction and prerequisites, to make sure you read the plan first then get all the prerequisites set up right.
| Articles in this series |
|---|
|
Introduction and prerequisites
In this article, we draw the plan and start the project. We will create a Jekyll website and create a VSTS project with a Git repository.
|
|
Part 1: The VSTS Build
In this article, we create the Jekyll build definition in VSTS.
|
|
Part 2: Create Azure Blob Storage, and configure static website
In this article, we create an Azure Blob Storage and we configure it to be ready for the deployment phase.
|
|
Part 3: The VSTS Release
You are here
In this article, we create the release definition. At the end, every code push in `master` will be deployed automatically.
|
|
Part 4: Configuring a Content Delivery Network (CDN)
Coming soon
In this article, we create the final piece of the puzzle, the way to access our Jekyll website using a custom domain over HTTPS. We also update the VSTS CD pipeline to account for this new addition.
|
|
Infrastructure as code
In this article, I give you the YAML code that you can use to automatically create the build definition by adding a `.vsts-ci.yml` file to your Jekyll website. This can replace "Part 1: The VSTS Build".
|
Create a Release definition
In VSTS, a Release is used to deploy builds.
You can do a lot more than that, but that’s it base role.
To create one, in VSTS:
- Click on
Release - Click on
Create release definition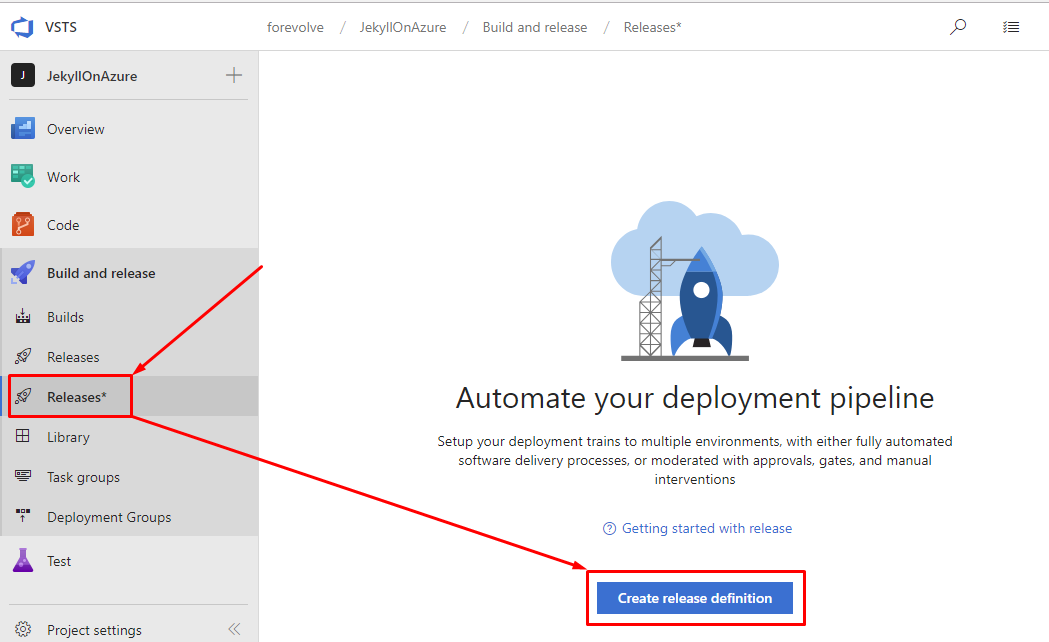
- Select
Empty pipeline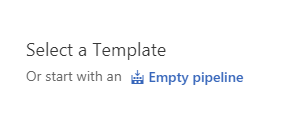


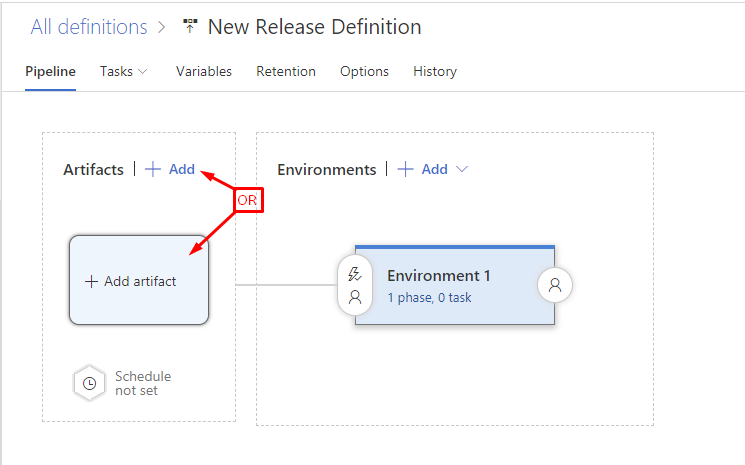
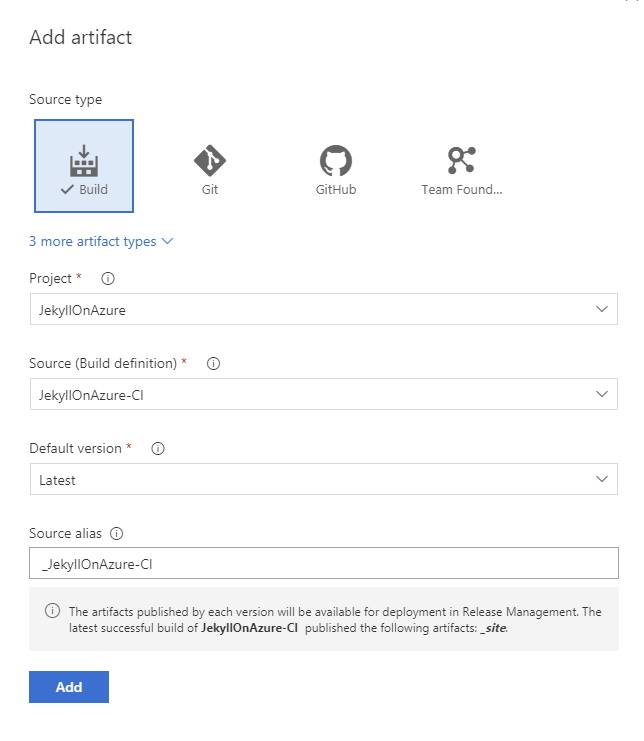
Add artifacts
From your empty release definition, choose the artifacts from the build definition created earlier (mine is named JekyllOnAzure-CI), then click Add.
Configure the deployment
We want to achieve 2 things here:
- Delete old files (from blob storage)
- Upload new files (from build artifacts to blob storage)
See also the Synchronizing files section below on how to synchronize the files using a single task.
Click on the 1 phase, 0 task link, under Environment 1 (or click the Tasks tab) to open the tasks panel.
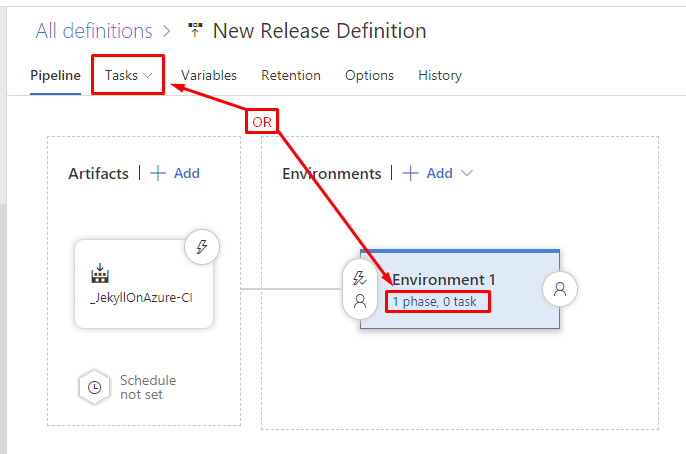
As you can see, this pane in very similar to build definitions. To achieve our goal:
- Click the
+icon - Search for
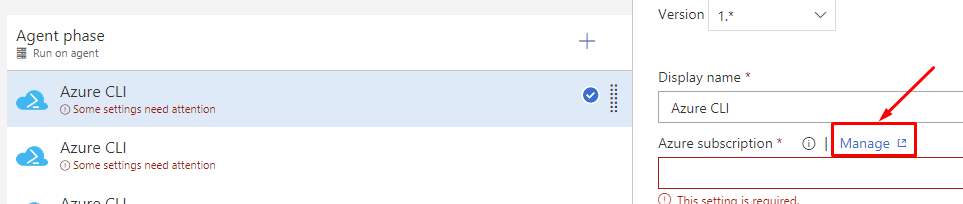
cli - Add 2
Azure CLItasks

Link an Azure subscription
When you click on the first Azure CLI task, you should see that many settings are required.
The first one is Azure Subscription.
In VSTS, you can create a preset for that setting at the project level by following the Manage link, which is the solution I chose.
Why? It allows you to “name a reusable connection to Azure”; which feels more explicit to me, especially when you have access to multiple Azure subscriptions.
From the Service endpoints page :
- Add a
New Service Endpoint - Select
Azure Resource Manager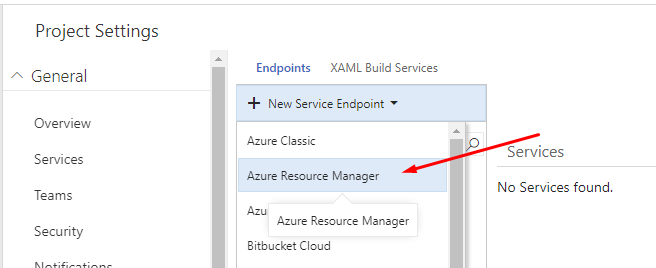
- Write a name for that connection (I chose
Jekyll on Azure resource group) - Choose your subscription
- Choose your resource group
- Click
OK

Configure Task 1: Delete old files
Our first task is to clean up old files. To do this, select the first Azure CLI task.
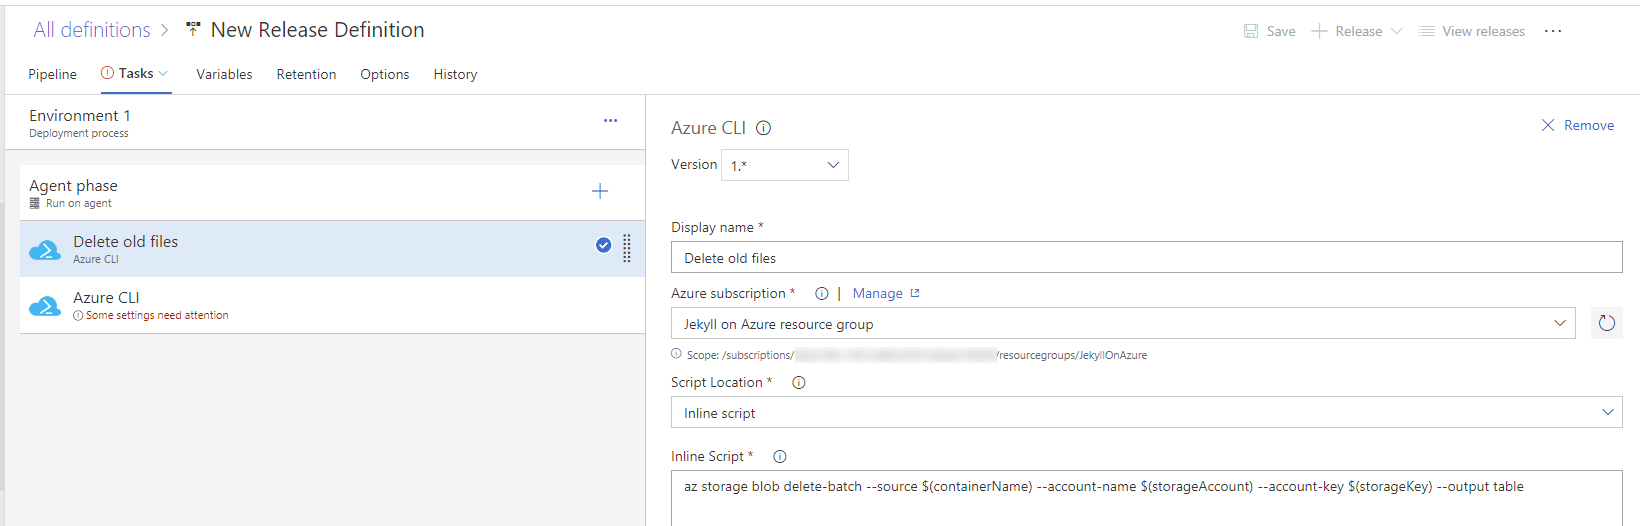
- Display name:
Delete old files - Azure subscription:
Jekyll on Azure resource group(choose the one you just created) - Script location:
Inline Scripts - Inline Script:
az storage blob delete-batch --source $(containerName) --account-name $(storageAccount) --output table - Working Directory: select the artifact name. Mine is
$(System.DefaultWorkingDirectory)/_JekyllOnAzure-CI.
Do not select the_sitesubdirectory.
As you may have noticed, I used
$(...)variables in the script. We will set those later.
Configure Task 2: Upload new files
Now that we cleaned the old files, let’s upload our artifacts.
Select the second Azure CLI task and do the same thing.
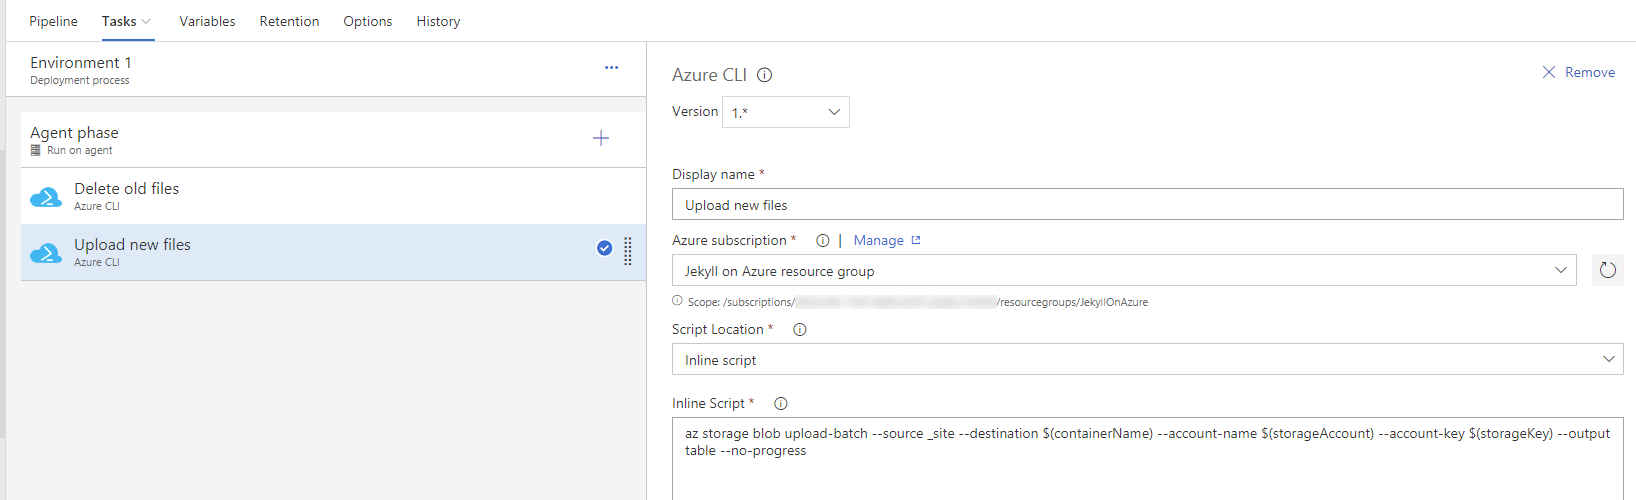
- Display name:
Upload new files - Azure subscription:
Jekyll on Azure resource group(choose the one you just created) - Script location:
Inline Scripts - Inline Script:
az storage blob upload-batch --source _site --destination $(containerName) --account-name $(storageAccount) --output table --no-progress - Working Directory: select the artifact name. Mine is
$(System.DefaultWorkingDirectory)/_JekyllOnAzure-CI.
Do not select the_sitesubdirectory.
Once again, as you may have noticed, I used variables in the script. We will set those later.
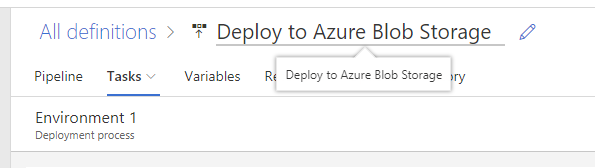
Give a name to the release definition
It is important to give accurate names to the stuff you create, this way you can remember what it does when you come back two years later.
I called mine
Deploy to Azure Blob Storage.
Set the variables
OK, one last thing to do before trying this out.
Navigate to the Variables tab and add the following variables:
- Set the
containerNamevalue to$web - Set the
storageAccountvalue to the name of your storage account. Mine wasjekyllonazure.
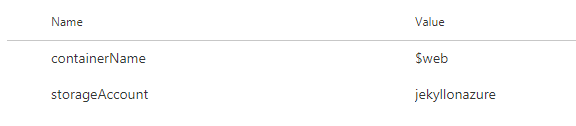
How does this work? The value of the
containerNamevariable will replace$(containerName)in the Azure CLI scripts. So it will execute that command:az storage blob upload-batch --source _site --destination $web [...]You can use variables extensively in VSTS.
Save and test the deployment
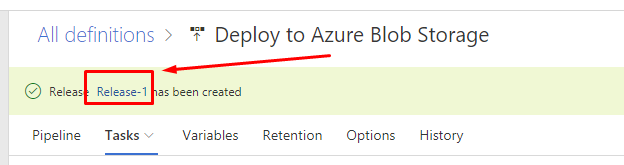
Now that everything is complete, let’s try this out!
- Save the release definition

- Create a Release

- Leave all the defaults and click
Create - Follow the release link
- You can click on the
In progresselement to navigate to the release details (to see the progress).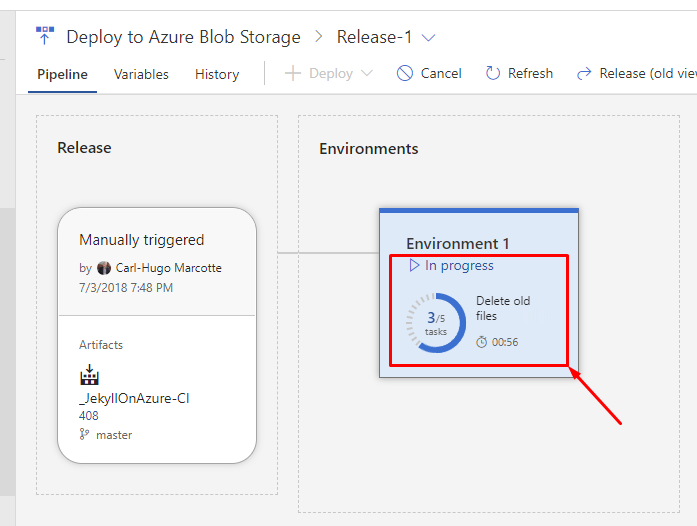
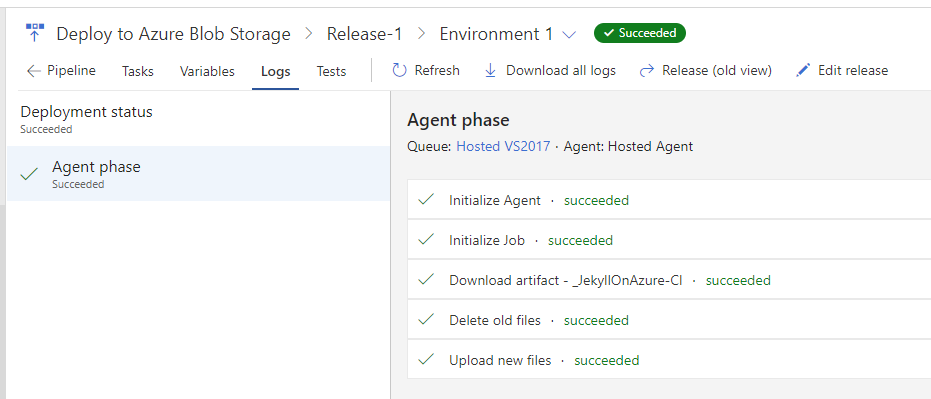
- Wait for the deployment to complete.
 OR (if you are in the details view)
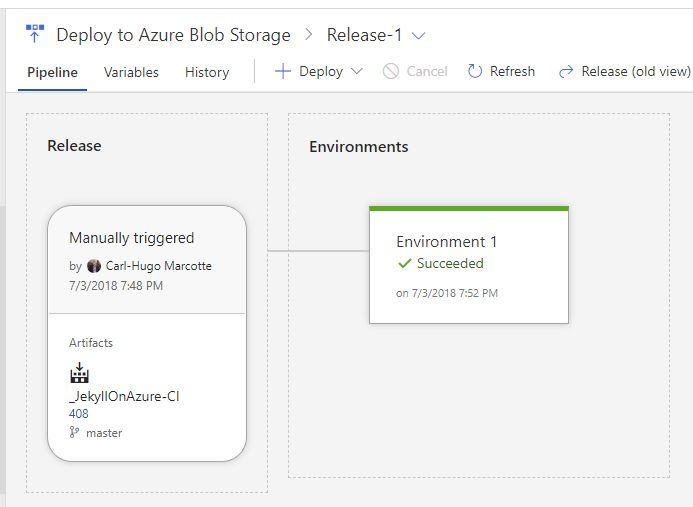
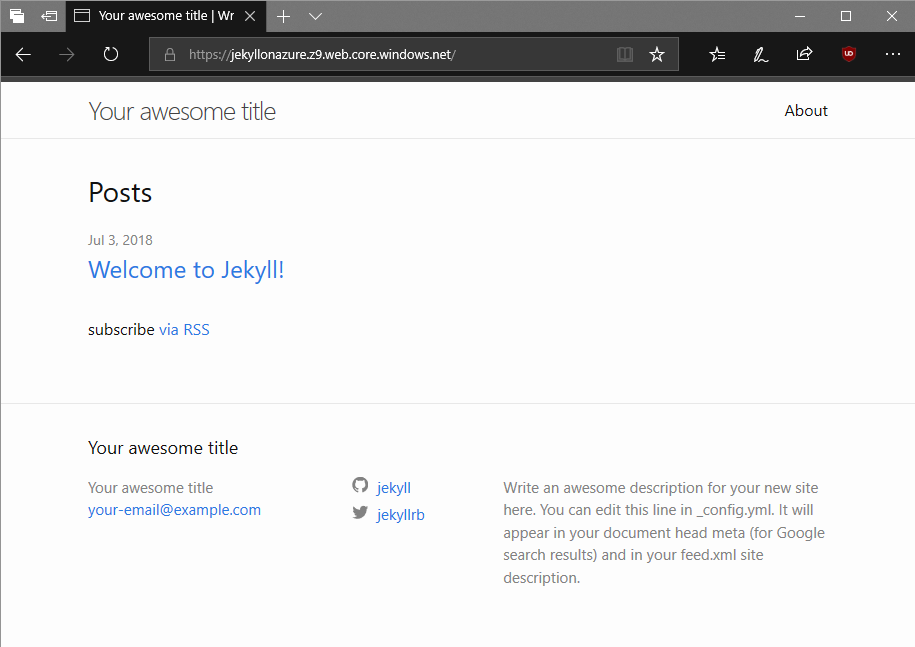
- Navigate back to your primary endpoint (mine was
https://jekyllonazure.z9.web.core.windows.net/) to test the Jekyll release.


 OR (if you are in the details view)

And once more: voilà!
Configure Continuous Deployment
At this point, we have a continuous integration build and the deployment works; let’s configure the release to be deployed automatically after a successful build.
To accomplish this, let’s start by going back to our release definition then:
- Click the artifacts lightning icon
- Enable the
Continuous deployment trigger - Click the
Addbutton (to add a branch to react to) - Select the
masterbranch (our only branch) - Save the release definition
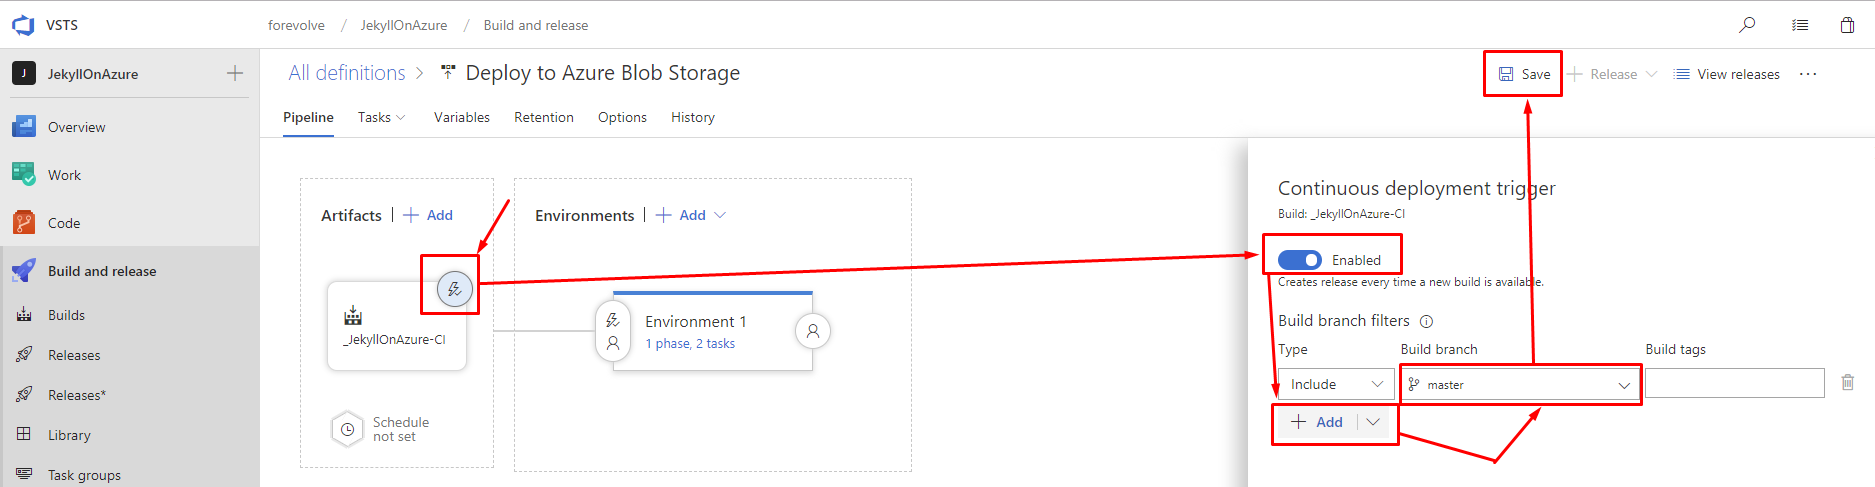
The filters are not required. However, I believe it is a good idea to limit the deployment to production to one or more explicitly defined branch(es). This could avoid unexpected behaviors and unplanned deployment of unstable releases to production.
Testing the Continuous Deployment pipeline
To test the continuous deployment pipeline, make a change in your Jekyll project, commit and push it to VSTS.
Personally, I added
**EDITED**at the bottom of theabout.mdpage.
Your project should be rebuilt then redeployed.
To see this happen:
- Go to the
Buildspage after your pushed your changes.
- Once the build is completed, go to the
Releasespage, and there you should see an in-progress release. Please note that there can be a delay between the end of a build and the beginning of a release. You may need to be patient here.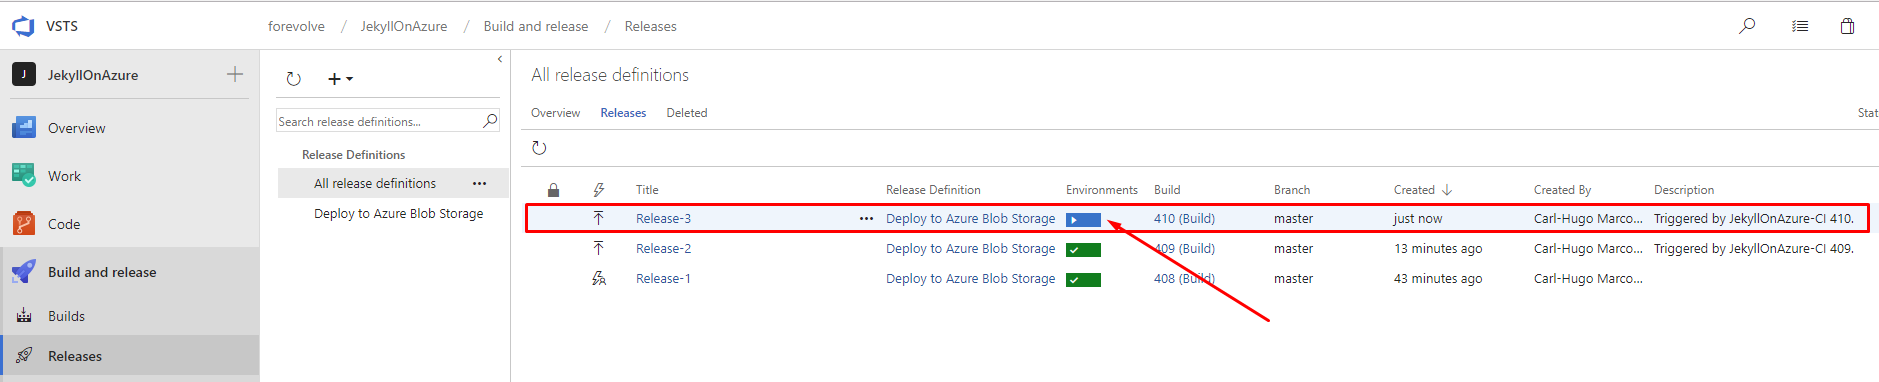


Another option is to grab a drink or something to eat and come back later (or work on something else for a few minutes).
Synchronizing files
Since I first wrote this article, the Azure CLI evolved; they added the sync option.
With that in mind, we could simplify our pipeline to a single Sync task instead of a delete task followed by an upload task. The Azure CLI task would look like this:
- Display name:
Synchronize files - Azure subscription:
Jekyll on Azure resource group(choose the one you created) - Script location:
Inline Scripts - Inline Script:
az storage blob sync -s _site -c $(containerName) --account-name $(storageAccount) - Working Directory: select the artifact name. Mine is
$(System.DefaultWorkingDirectory)/_JekyllOnAzure-CI.
Do not select the_sitesubdirectory.
Thanks to Maximilian Melcher for pointing this out in the comments. He also as a great blog post about that feature if you want to know more about it (it is a quick read): Azure Storage Blob Sync - Updates to AzCopy and Azure CLI.
A note about deleting files.
This section applies mostly to the original delete/upload workflow but some parts could also be applied to other use-cases.
This delivery pipeline is very basic, if we’d want, instead of deleting all files before uploading the new ones, we could begin by uploading the new files to then delete unwanted files from the destination (if any). We could also only upload new files and leave the old unused one there (depending on your website’s content of course).
Nevertheless, in the end, once the CDN is connected to the site, deleting all blobs should not shut down the website, the CDN should have them pre-loaded and use its own file cache to serves them to your visitors.
If for some reason a downtime does occur or if you don’t want to take that risk, I see the following few possible solutions. A possible cause for this would be if you update your site more frequently than the time it takes the CDN to pre-load the site’s assets. A.K.A. the time it takes for all of your resources to be viewed by a user is longer than the time you push your updates.
- Disable (or remove) the
Delete old filestask (or code yourself asynchronization/difftask and feel free to share it with me). Since you should add files more often and not delete files that often, disabling this task could even speed up your delivery pipeline.
- Add an
az cdn endpoint loadtask before theDelete old filestask. This would pre-load the whole website before the deletion of files.- Update the pipeline so it can “choose” if it needs to delete files or not. This could be based on branches, releases, a manual trigger, manual approval, or some other requirements.
See
Part 4: Configuring a Content Delivery Network (CDN)for more info about the CDN task.
Next step
It is now time to move to the next article: Part 4: Configuring a Content Delivery Network (CDN) that’s coming soon; stay tuned it should not take long until its release.
Until I publish the CDN article, you can move to (if not already read): Infrastructure as code.